Last Updated on May 26, 2026 by Melissa
Everything you need to plan, time, and execute an incredible visit to Yosemite National Park — including what’s changed this year. This post contains affiliate links — if you book or buy through them, I may earn a small commission at no extra cost to you. Thanks for supporting Part-Time Adventuring!
Table of Contents
- What’s Changed at Yosemite in 2026: No More Reservations
- Yosemite Entrance Fees & Passes (Including America the Beautiful)
- How to Get to Yosemite National Park
- Best Time to Visit Yosemite National Park
- Yosemite Parking Tips 2026: How to Beat the Crowds
- What to Do Before You Lose Cell Service in Yosemite
- Yosemite Bear Safety: Food Storage Rules First-Timers Miss
- Must-See Sights in Yosemite National Park
- Yosemite Waterfalls Guide: Best Falls & When to See Them
- Best Yosemite Hikes for Every Difficulty Level
- Yosemite Itinerary: 1 Day, 2 Days & 3 Days
- Where to Stay Near Yosemite National Park
- Yosemite Packing & Trail Tips for First-Timers
- Final Thoughts: Is Yosemite Worth It in 2026?
What’s Changed at Yosemite in 2026: No More Reservations
After several years of required reservations, Yosemite is no longer requiring timed entry permits for summer 2026 — the first fully open summer since 2020. The park says congestion will now be managed through staffing and real-time monitoring instead.
Here’s the honest wake-up call: this doesn’t mean Yosemite will be less crowded. On Saturday, May 2, 2026 — weeks before peak summer — Yosemite Valley ran out of parking before 11am. The park sent an emergency alert: “All parking in Yosemite Valley is full. Avoid entering Yosemite Valley.” About 90 minutes later, Hetch Hetchy was full too, with 90-minute delays at the south entrance.
That was May. Summer will be worse.
Important note: Half Dome still requires a separate permit via lottery on Recreation.gov, regardless of the timed entry change. Apply well in advance.
Yosemite Entrance Fees & Passes (Including America the Beautiful)
Yosemite charges $35 per vehicle (valid for 7 days), $30 per motorcycle, and $15 per person on foot or by bike.
If you’re visiting more than two or three national parks in a year, the America the Beautiful Annual Pass ($80) pays for itself fast — it covers entrance to over 2,000 federal recreation sites including all national parks. You can buy it at any park entrance or in advance at store.usgs.gov. Free passes are also available for military members, fourth graders (Every Kid Outdoors program), seniors (62+), and visitors with permanent disabilities.
How to Get to Yosemite National Park
Yosemite is nestled in California’s Sierra Nevada, about 4 hours east of San Francisco. There are several entrances, each with a different character:
- Big Oak Flat Entrance — off Highway 120, about 2.5 hours from Sacramento
- South Entrance — near Mariposa Grove, about 4 hours from San Francisco
- Arch Rock Entrance — just an hour from Mariposa, drops you closest to Yosemite Valley
Note that Tioga Road and Glacier Point Road close in winter due to snow. Always check nps.gov/yose before you leave for current road and parking conditions.
Best Time to Visit Yosemite National Park
Every season in Yosemite offers something worth seeing:
- Spring (March–May): Waterfalls are at their fullest — this is the peak waterfall season as Sierra Nevada snowmelt roars down the valley. Wildflowers bloom and most trails begin to open. Comfortable temperatures make for great hiking. Just go early in the day; parking fills up fast even in May.
- Summer (June–August): Best season for high country trails and most hikes. It’s the busiest time by far — see the parking tips below.
- Fall (September–November): Crowds thin, the air cools, and foliage turns vibrant. One of the best times for a peaceful visit.
- Winter (December–February): Quiet and magical. Snow transforms the park into a winter wonderland ideal for snowshoeing. Many roads close but the valley itself is accessible.
For the most peaceful experience, spring or fall are your best bets. If you must visit in summer, read the next section carefully. For broader strategies on timing any national park visit, check out our post on how to avoid crowds at National Parks.
Yosemite Parking Tips 2026: How to Beat the Crowds
The parking situation is the defining challenge of a summer Yosemite visit. Here’s how to navigate it:
Arrive before 7am or after 6pm. If you want to park in the valley, this is non-negotiable in summer. Valley parking fills before 11am on busy days.
Visit on weekdays. Tuesday through Thursday are dramatically less crowded than weekends. Delays and congestion are noticeably worse on Saturdays, Sundays, and holiday weekends.
Use the free Valley Shuttle. Park once near Yosemite Village and ride the free shuttle between valley stops all day — no hunting for multiple parking spots. The Valley shuttle runs daily from 7am to 10pm and serves 19 stops. It’s genuinely the best way to see the valley.
Consider YARTS if parking is your biggest concern. The Yosemite Area Regional Transportation System (YARTS)runs bus routes into the park from gateway towns including Merced, Mariposa, Sonora, Oakhurst, and Mammoth Lakes. Tickets run around $20/person and once you’re in, YARTS buses even get to use a bus-only lane when traffic is heavy. If you’re staying in a gateway town or day-tripping from further away on a peak summer weekend, riding YARTS in and using the free valley shuttle once inside is genuinely the lowest-stress option. Arrive at your YARTS stop early — they recommend it.
Stay inside the park. Book a campground or lodge at Yosemite Valley Lodge and you’re already inside before day visitors flood in. Both in-park lodging and campgrounds book out months ahead — check Recreation.gov immediately.
Once you find parking, don’t move. Seriously. Use the shuttle to get around within the valley. If you leave your spot mid-day to relocate, you may spend an hour circling for another one.
Monitor real-time conditions. Check nps.gov/yose before you leave your hotel. If the valley is full, they’ll say so, and you can adjust your plans.
What to Do Before You Lose Cell Service in Yosemite
Cell service inside Yosemite is essentially nonexistent — especially in the valley and on the trails. Before you leave your lodging or gateway town each morning:
- Download your AllTrails route offline so maps work without signal
- Screenshot your campground or lodging reservation from Recreation.gov
- Screenshot the NPS conditions page so you have it if lots fill up
- Download the NPS Yosemite app (works partially offline)
- Save the YARTS schedule if you’re using the bus
Don’t count on being able to look anything up once you’re inside the park.
Yosemite Bear Safety: Food Storage Rules First-Timers Miss
Yosemite has an active black bear population and food storage is strictly enforced — violations can result in fines. A few non-negotiable rules:
- Never leave food in your car. Bears can smell it through closed windows and have been known to break in. Use the bear boxes provided at trailheads and campgrounds.
- At campgrounds, all food, scented items (sunscreen, toothpaste, lip balm), and cooking gear must be stored in the metal bear boxes when not in use — even briefly.
- On the trail, use a bear canister for overnight trips and never leave a pack unattended with food in it.
- If you see a bear, stay calm, make yourself large, and back away slowly. Never run or approach.
This isn’t a scare tactic — bears in Yosemite are habituated to humans. Take it seriously.
Must-See Sights in Yosemite National Park
Yosemite Valley
The heart of the park and home to the most iconic views:
- El Capitan — The towering granite monolith is a rock climber’s paradise and one of the most awe-inspiring sights in any national park.
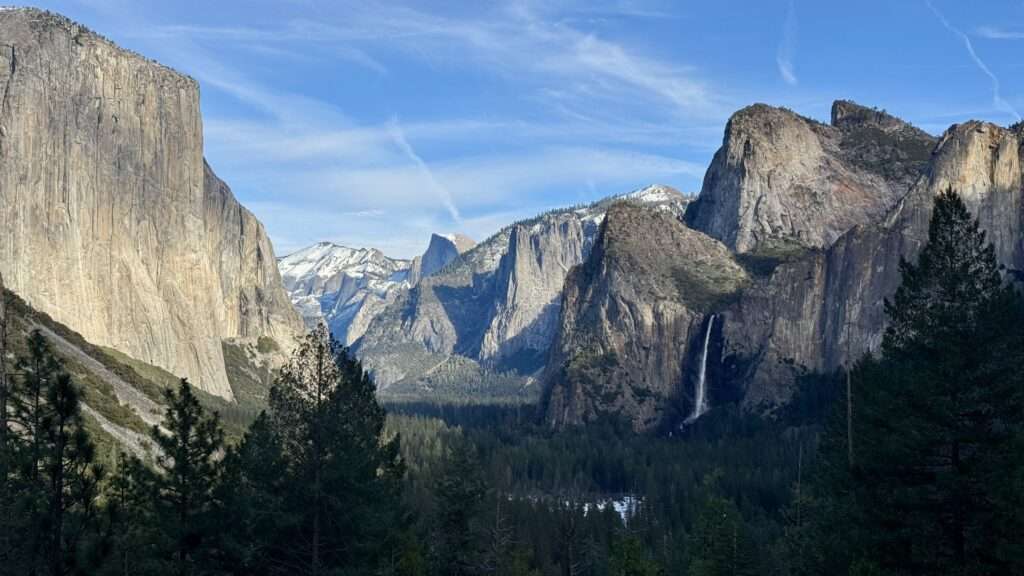
- Tunnel View — A single panoramic pull-off that captures El Capitan, Half Dome, and Bridalveil Fall all in one frame. Don’t skip it.
- Yosemite Falls — At 2,425 feet, it’s the tallest waterfall in North America. Easily viewable with a short flat walk to the base.
Glacier Point
One of the most jaw-dropping viewpoints in any national park — Glacier Point offers panoramic views of Half Dome and the entire valley. Accessible by car seasonally, or via a challenging hike. Pair it with the Panorama Trail for a full-day hike down to the valley.
Mariposa Grove
Home to over 500 giant sequoias, including the famous Grizzly Giant. Trails range from a short loop to a more strenuous hike — great for all levels. Best reached via the free shuttle from the South Entrance parking area.
Yosemite Waterfalls Guide: Best Falls & When to See Them
Yosemite’s waterfalls are at their peak in early summer, when snowmelt is highest and flows are thunderous. Here’s what to know about each one:
Yosemite Falls
North America’s tallest waterfall at 2,425 feet, split into three sections: Upper, Middle, and Lower Falls. The Lower Yosemite Falls Trail is a flat 1-mile loop accessible to all, including families. For the full experience, the Upper Yosemite Falls Trail is a strenuous 7.2-mile round trip with 2,600 feet of elevation gain. Pro tip: Arrive early to catch the sunrise illuminating the falls.
Bridalveil Fall
One of the park’s most iconic waterfalls at 620 feet, known for its ethereal mist that can leave you soaked on approach. The Bridalveil Fall Trail is just 0.5 miles round trip and very easy. Bring a rain jacket or waterproof layer if you want to get close.
Vernal Fall
Famous for its vibrant green pool and the experience of hiking through its mist on the Mist Trail. Moderate effort: 3 miles round trip with 1,000 feet of elevation gain. The trail lives up to its name — waterproof shoe covers are worth it.
Nevada Fall
At 594 feet, it’s a stunning follow-up to Vernal Fall, offering panoramic valley views. Combined with Vernal Fall via the Mist Trail + John Muir Trail, it’s a 7-mile round trip. Smart move: Take the Mist Trail up and John Muir Trail down for a less slippery descent.
Horsetail Fall
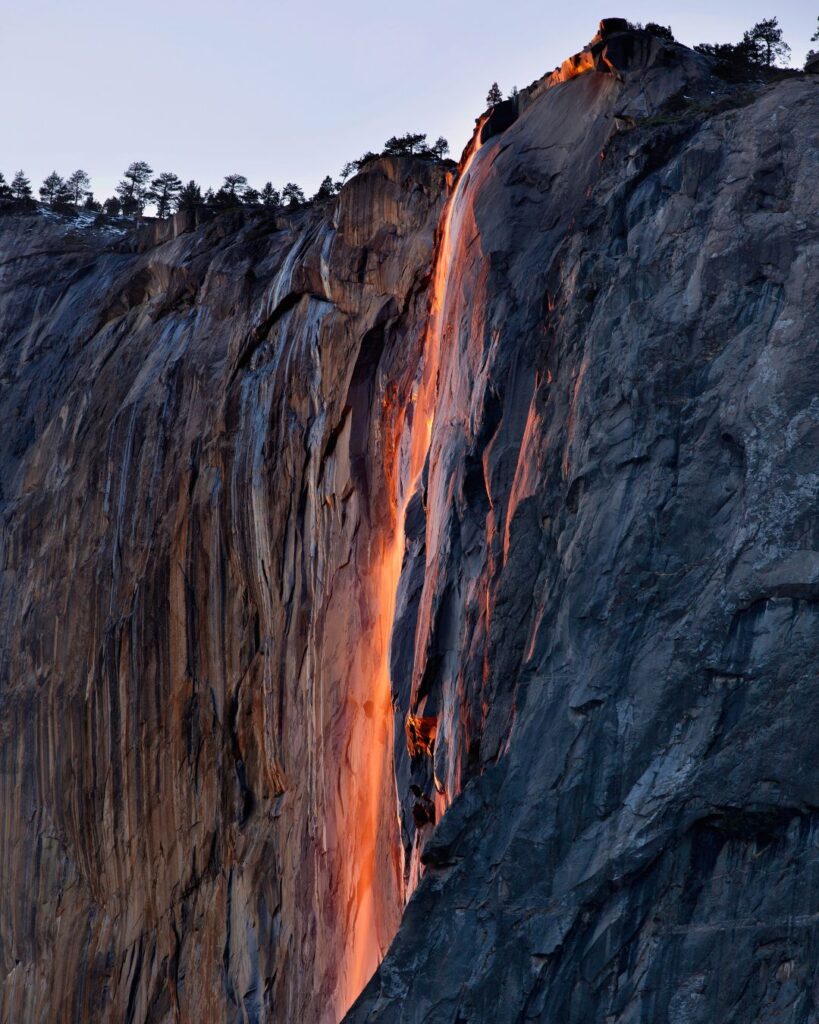
Famous for the “Firefall” phenomenon in February, when the setting sun illuminates the falls in orange and red (permit required). In early summer it’s still impressive — good views from El Capitan Picnic Area without any strenuous hiking.
Best waterfall season tip: Early summer is the sweet spot. Trails are clear of snow, temperatures are comfortable, and snowmelt flows are at their strongest. Plan waterfall hikes for morning to get the best light and beat the crowds.
Best Yosemite Hikes for Every Difficulty Level
Download AllTrails before your trip — it lets you filter by difficulty, mileage, and elevation gain, and works offline. Always check trail conditions before heading out.
Easy Yosemite Hikes
Bridalveil Fall Trail 0.5 miles round trip | 80 ft elevation gain The quickest way to a spectacular waterfall. Best in spring and early summer. Arrive early for unobstructed views.
Lower Yosemite Fall Trail 1 mile loop | Minimal elevation gain Accessible year-round, wheelchair accessible, ideal for families. Great close-up views of the falls.
Mirror Lake Trail 2 miles to the lake, 5 miles for the full loop | 100 ft elevation gain Best in spring when water levels are highest for stunning Half Dome reflections on the lake’s surface.
Moderate Yosemite Hikes
Vernal Fall Footbridge via Mist Trail 1.6 miles round trip | 400 ft elevation gain Up-close views of Vernal Fall. The steep trail near the falls can be slippery — start early to beat the crowds.
Sentinel Dome 2.2 miles round trip | 400 ft elevation gain Accessible via Glacier Point Road. Panoramic views of El Capitan, Half Dome, and the entire valley from the summit. A short but remarkably rewarding hike.
Columbia Rock via Upper Yosemite Falls Trail 2 miles round trip | 1,000 ft elevation gain A stunning valley overlook — great introduction to the full Upper Yosemite Falls Trail. Steep switchbacks but very worthwhile.
Mist Trail to Vernal and Nevada Falls 7 miles round trip | 2,200 ft elevation gain The classic full Yosemite valley hike. Combines two of the park’s most spectacular waterfalls in one outing. Start by 6am to beat the crowds and the heat.
Difficult Yosemite Hikes
Upper Yosemite Falls Trail 6.6 miles round trip | 3,300 ft elevation gain Sweeping valley views and close encounters with the full height of Yosemite Falls. Start early and carry plenty of water — the trail is exposed and can get hot.
Glacier Point via Four-Mile Trail 10 miles round trip | 3,400 ft elevation gain Panoramic views of the valley including El Capitan and Half Dome. A serious climb — the payoff at Glacier Point is extraordinary.
Clouds Rest 12.6 miles round trip | 3,110 ft elevation gain A quieter alternative to Half Dome with equally jaw-dropping panoramic views. Worth considering if Half Dome permits aren’t available.
Half Dome via Mist Trail ⭐ 14–16 miles round trip | 4,800 ft elevation gain Permit required via lottery on Recreation.gov — apply well in advance. The iconic summit hike. The cables are typically up from late May through early October. Gloves are strongly recommended for gripping the cables on the final ascent. Start by 4–5am — this is a long, demanding day.
Yosemite Itinerary: 1 Day, 2 Days & 3 Days
Not sure how to structure your time? Here are three frameworks depending on how long you have. Adjust based on your fitness level and what time you can get into the park.
🗓 One Day Yosemite Itinerary
Best for: Day trippers, first-timers who can only spare one day
Before 7am — Arrive at the valley and secure parking near Yosemite Village, or park outside the park and ride YARTS in. Do not sleep in — this is the day’s most important move.
7–9am — Walk the Lower Yosemite Falls Trail while the morning light hits the falls and the valley is still quiet. Stop at the Bridalveil Fall Trail on the way in or out.
9am–12pm — Hike the Mist Trail to Vernal Fall. This is the essential Yosemite hike. Start early enough and you’ll have the first stretch mostly to yourself.
12–2pm — Take the valley shuttle to Tunnel View for the iconic panoramic shot of El Capitan, Half Dome, and Bridalveil Fall. Eat lunch at the valley (pack your own to save time).
2–5pm — Drive up to Glacier Point if Glacier Point Road is open (check before you go). The views here are arguably more impressive than anything you’ll see from the valley floor.
5–7pm — Return to the valley as day visitors begin to leave. This is a beautiful time to walk Cook’s Meadow or stroll along the Merced River before heading out.
🗓 Two Day Yosemite Itinerary
Best for: Weekend visitors staying inside the park or at a gateway town
Day 1 — Valley & Waterfalls
- Arrive by 7am and park once for the day
- Morning: Mist Trail all the way to Nevada Fall (7 miles, full day option) or stop at Vernal Fall for a half-day
- Afternoon: Valley shuttle to Bridalveil Fall and El Capitan Meadow
- Evening: Tunnel View at sunset — the light on El Capitan at golden hour is extraordinary
Day 2 — High Country & Big Views
- Morning: Drive to Glacier Point early — the views before the tour buses arrive are something else
- Mid-morning: Hike Sentinel Dome (2.2 miles, easy to moderate) for 360° views from the top
- Afternoon: Head to Mariposa Grove to walk among the giant sequoias — a completely different side of the park that many day visitors skip entirely
- Evening: Return to valley for a final sunset stroll or watch the alpenglow on Half Dome from Sentinel Bridge
🗓 Three Day Yosemite Itinerary
Best for: Those staying inside the park, serious hikers, or anyone who wants to go deeper
Day 1 — Valley Immersion Follow the one-day itinerary above. Having extra days means you don’t have to rush the Mist Trail — go all the way to Nevada Fall and back (7 miles) and take your time with it.
Day 2 — High Country
- Early start to Glacier Point
- Hike Sentinel Dome and Taft Point loop (5.1 miles) — one of the best moderate hikes in the park and far less crowded than valley trails
- Afternoon at Mariposa Grove — arrive later in the day as morning tour groups thin out
Day 3 — Choose Your Challenge
For strong hikers: Attempt the Upper Yosemite Falls Trail (6.6 miles, 3,300 ft gain) — start by 6am, carry plenty of water. The views from the top are a completely different perspective on the valley.
For a Half Dome permit holder: This is your day. Set your alarm for 3am, be on trail by 4:30am, and allow 10–14 hours round trip. Bring gloves for the cables.
For a more relaxed day: Drive Tioga Road (open summer only) into the high country — Olmsted Point and Tenaya Lake offer stunning scenery with minimal hiking required. This area sees far fewer visitors than the valley.
Where to Stay Near Yosemite National Park
Inside the Park
Staying inside means you’re already positioned before day visitors arrive — a massive advantage in summer.
- The Ahwahnee — Historic luxury hotel, stunning architecture, iconic dining room. Book many months ahead.
- Yosemite Valley Lodge — Conveniently located near Yosemite Falls, great base for valley exploration.
- Upper Pines Campground — Open year-round, great for families.
- Tuolumne Meadows Campground — Open seasonally, offers a more secluded, high-country camping experience.
All in-park lodging and campgrounds are booked via Recreation.gov and fill up months in advance. Check immediately and set alerts.
Outside the Park
- Tenaya Lodge — Family-friendly, near the South Entrance, with amenities and easy access to trails.
- Rush Creek Lodge — Near the Big Oak Flat Entrance, modern amenities.
- Vacation rentals — Great for larger groups, with the bonus of a kitchen and home amenities. Short drive from the park near Groveland, El Portal, or Fish Camp.
Yosemite Packing & Trail Tips for First-Timers

Trail etiquette: Yield to uphill hikers. Be respectful of hikers, cyclists, and equestrians sharing the trails.
Gear up right: Bring sturdy hiking boots, layers (temperatures change fast at elevation), sunscreen, and a headlamp for early starts. Rain gear is worth carrying spring through fall.
Water: Yosemite’s elevation can accelerate dehydration. Carry more water than you think you need on any hike. A filter bottle or purification tablets let you refill from streams on longer trails.
Safety: Stick to designated trails near waterfalls — rocks can be slippery and currents near falls are dangerously strong. Check weather and trail conditions at nps.gov/yose before every hike.
Timing for waterfalls: Spring and early summer for the biggest flows. By late summer many seasonal falls slow to a trickle.
Photography: Tunnel View at sunrise. Glacier Point at sunset. Mirror Lake in spring for Half Dome reflections. Valley floor during the golden hours before and after the midday crowds arrive.
Final Thoughts: Is Yosemite Worth It in 2026?
Of all the major national parks, Yosemite in 2026 requires the most careful planning. The removal of timed entry reservations does not mean this park is less crowded — it means the crowd management tool is gone. The early May parking crisis was a preview of what peak summer looks like.
Be in the valley by sunrise. Book lodging inside the park if at all possible. Visit on weekdays. Use the shuttle. Download everything before you lose cell service. Respect the bears. And check conditions before you go.
Yosemite is worth every bit of effort it takes to experience properly. Plan smart and it will be one of the most remarkable places you’ve ever stood.
Useful links:
- Park conditions & parking: nps.gov/yose
- Camping, lodging & Half Dome permits: Recreation.gov
- Trail maps & reviews: AllTrails
- Bus from gateway towns: yarts.com
- How to avoid crowds at any national park: Part-Time Adventuring